
This article demonstrates how to save Gmail attachments to Box using Google Apps Script and the Box API.
IFTTT used to have a recipe that would send the attachments of Gmail messages to a folder in Box. When it was revealed that Gmail app developers could read the emails of Gmail users, Google stepped up it’s policies to assure users that their emails were safe. IFTTT was ultimately unable to update their system so that it was in compliance with Googles new API ecosystem.
Some of the clients I worked for used this IFTTT recipe to streamline their workflows and the change meant that we had to modify an already effective process.
At the time, it didn’t make sense to write a custom solution. Instead, we switched to sending Gmail attachments to Google Drive using something like this.
However, I was never satisfied with the switch since it split the workflow of some employees across two different products. I finally decided to sit down and solve the problem. Below is what I arrived at. Hopefully it will help some others who have arrived in a similar situation.
If you need help configuring this or something like it for your business, reach out to jc@jcconnell.com to get started.
How to Save Gmail Attachments to Box
We’ll be using Google Apps Script and the Box API to accomplish our goals here.
Setting Up The Script
Visit the link below:
Google Apps Script – Save Gmail Attachments to Box
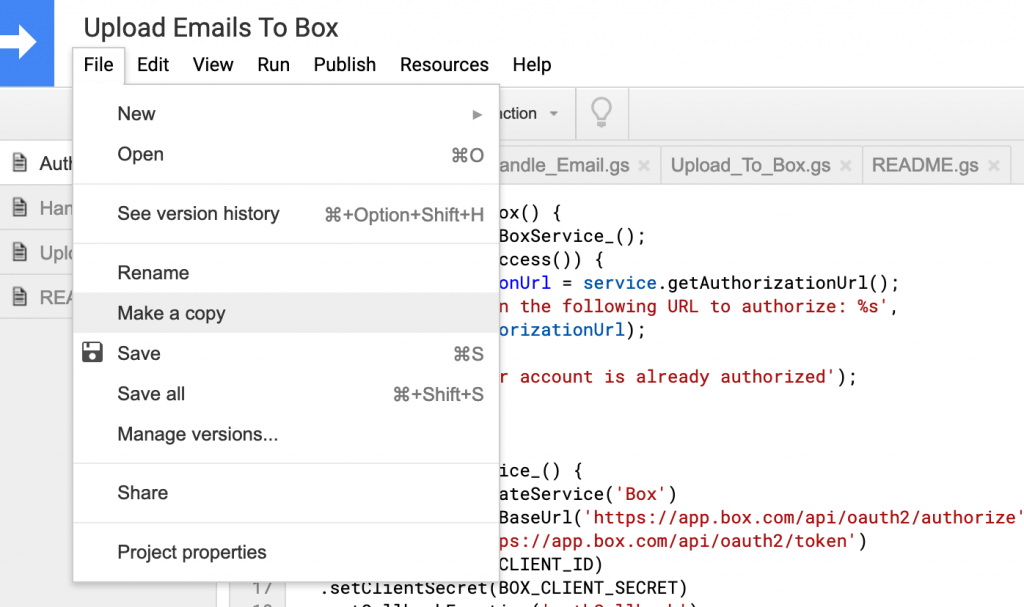
Make a copy of the script:
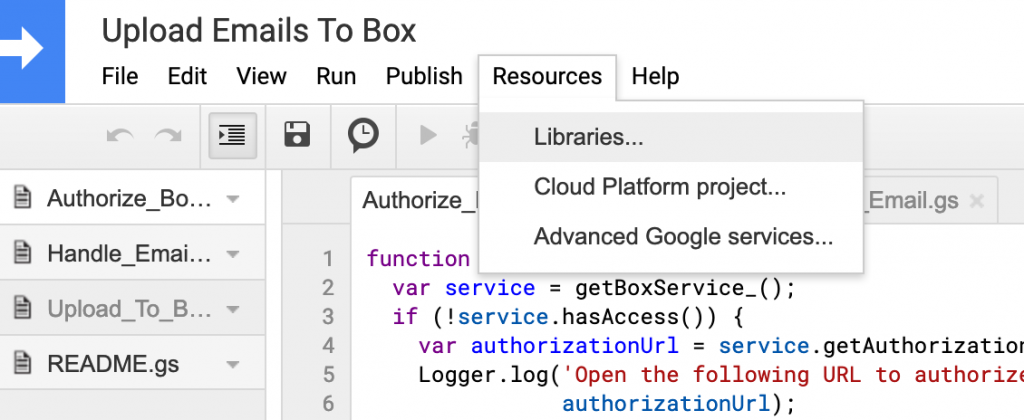
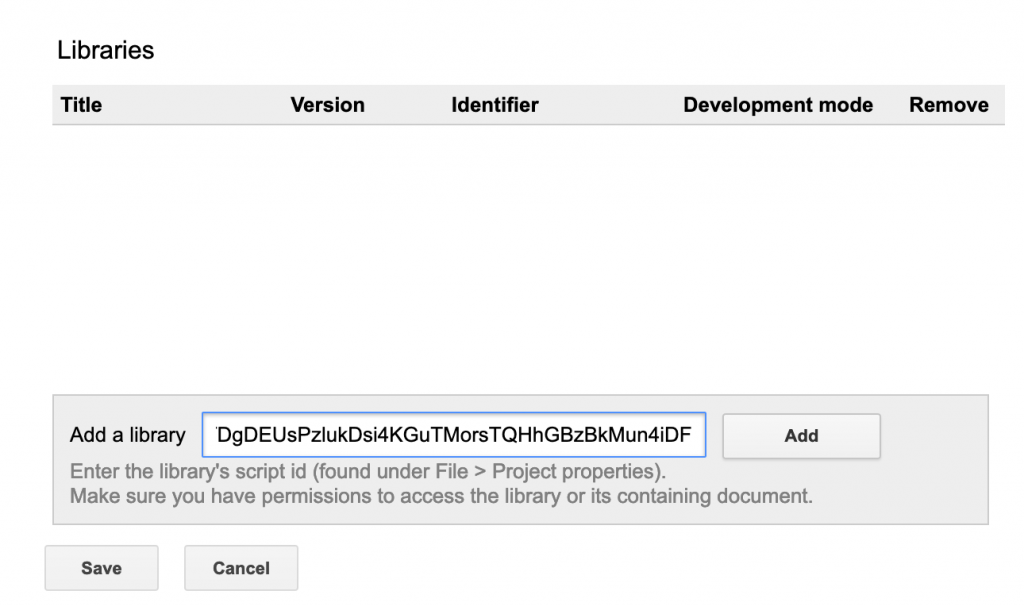
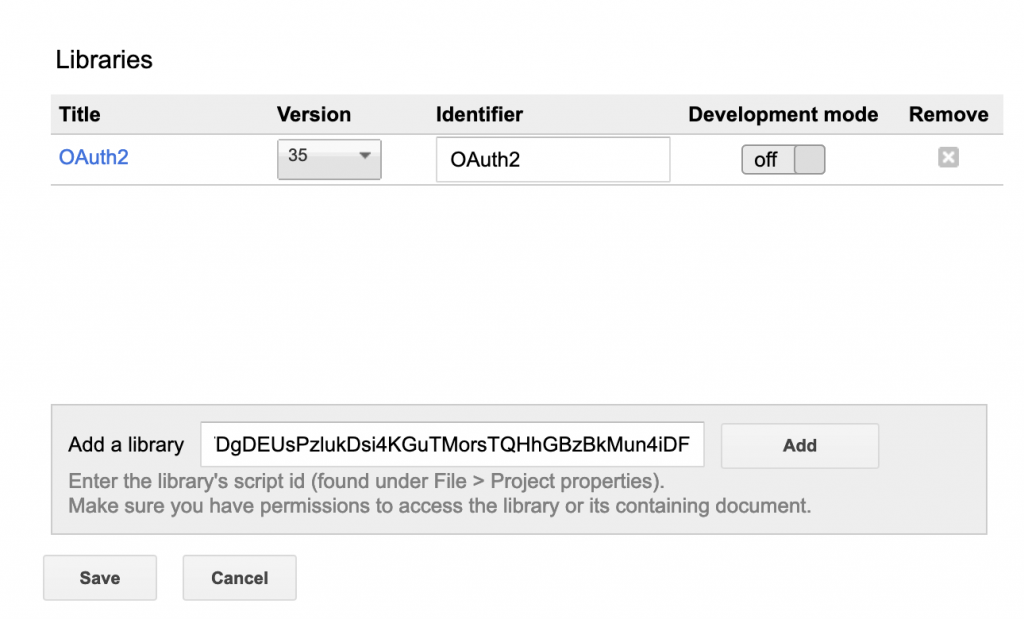
The script relies on the OAuth2 library to authenticate with the Box API. Follow the steps here to add it to your project: OAuth2 Setup.
Setting Up Your Box App
Visit https://app.box.com/developers/console and:
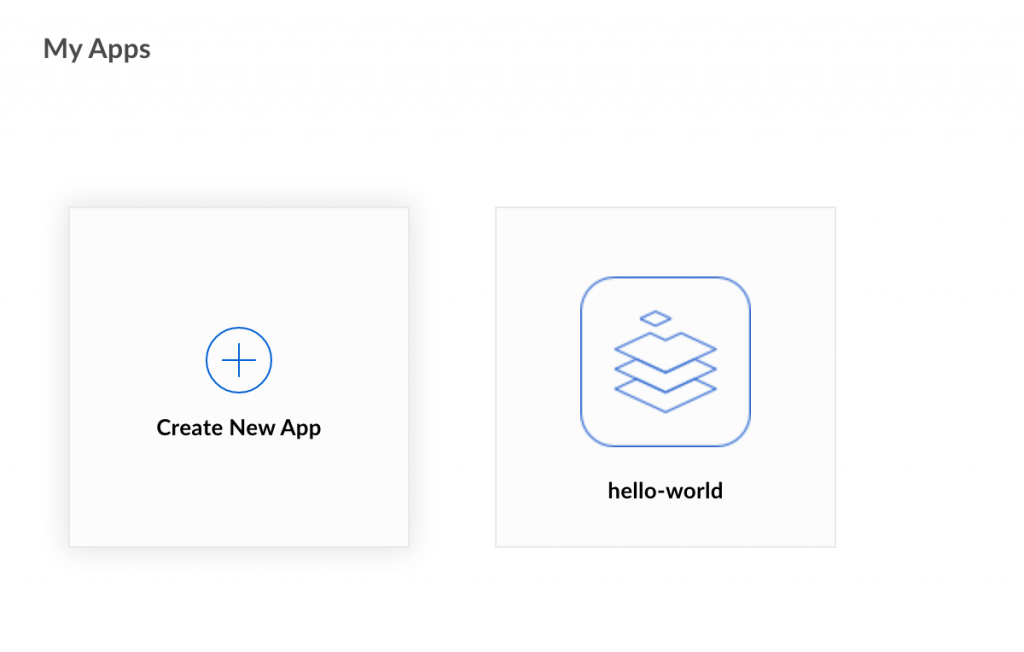
- Click “Create new app”
- Choose “Custom App”
- Choose “Standard OAuth 2.0 (User Authentication)
- Enter a name for your app

Create New 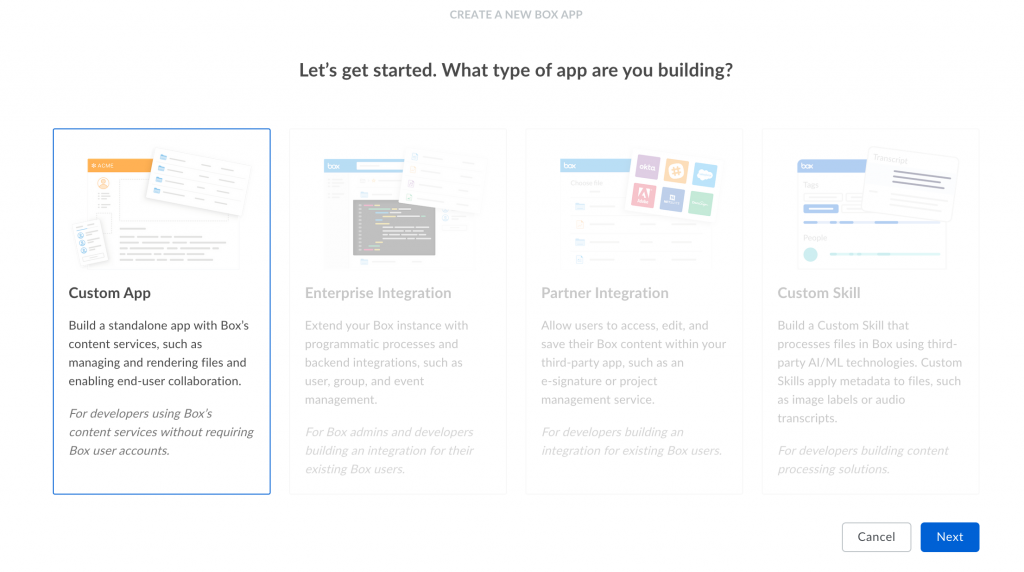

Choose Custom 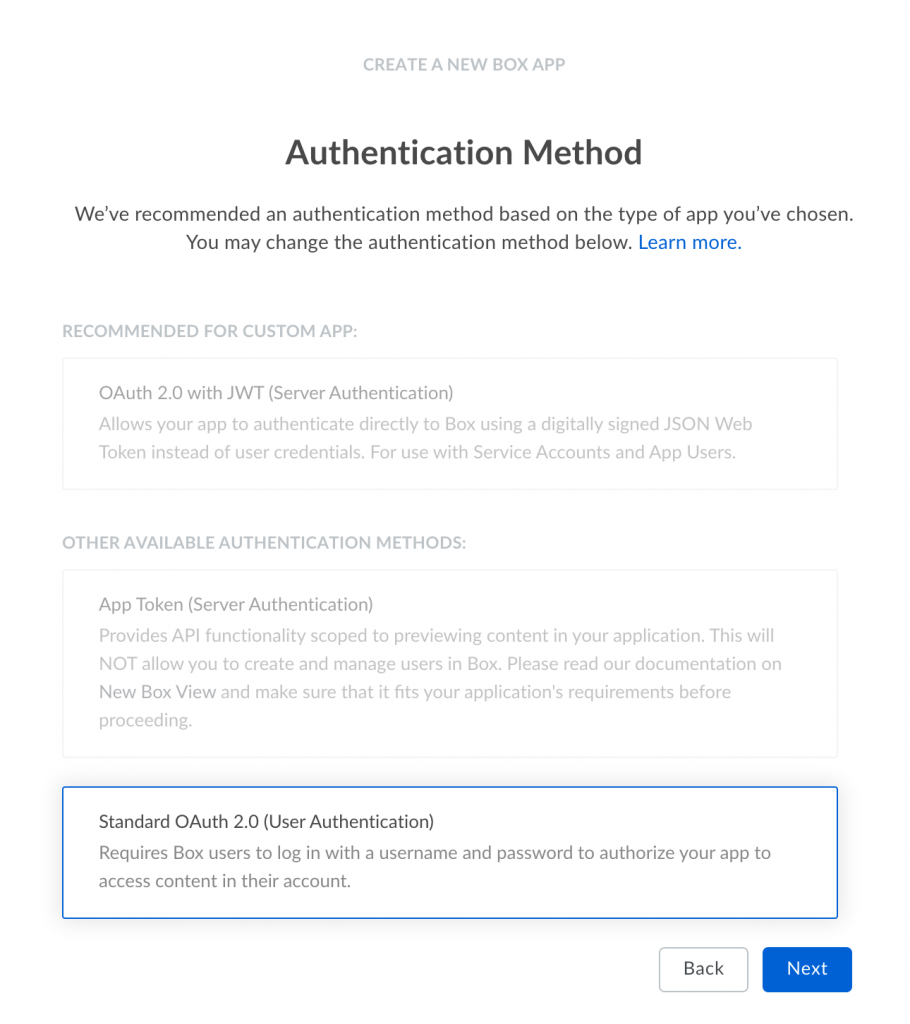

Choose User 

Enter A Name
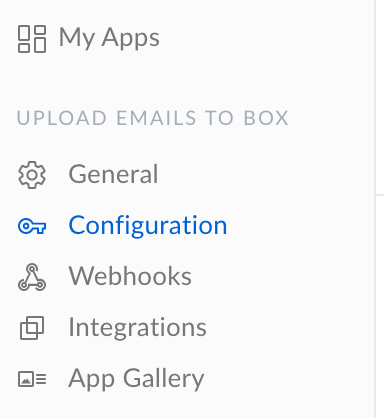
Once your new app is created, click on it and then choose “Configuration” from the left-hand menu:
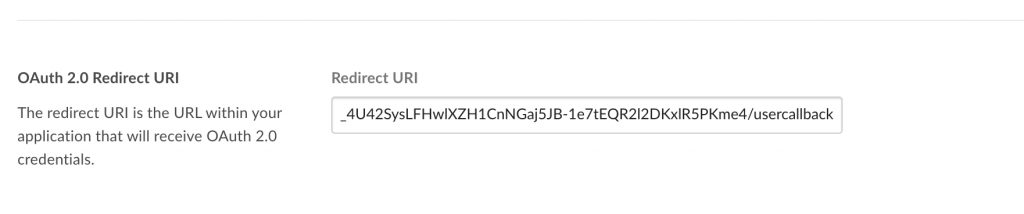
Head back to the Google Apps Script project you copied earlier. Choose File > Script Properties and then copy the value under “Script ID” into the URL example below:
https://script.google.com/macros/d/{SCRIPT_ID}/usercallback
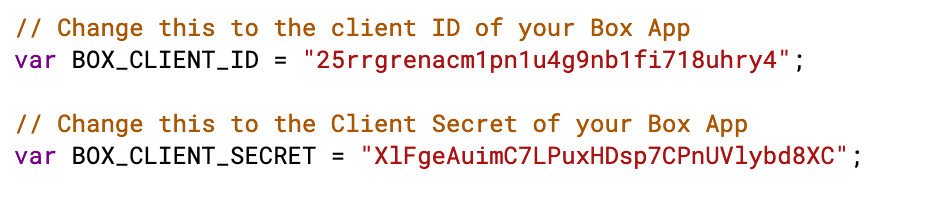
Paste the URL you’ve created into the “Redirect URI” field of the configuration of your new Box app. While you’re there, copy the “Client ID” and “Client Secret” values into the same variables of the “README.gs” file of your new Google Apps Script project. If you’ve done everything correctly, you should have two images like the below. Note: The values below are for example only, they will not work.
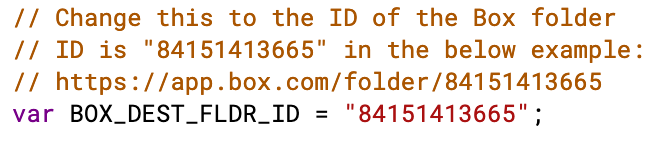
Next we’ll need the Box folder id. Navigate to the folder where you’d like to save your Gmail attacments. The URL will resemble something like this:
https://app.box.com/folder/84151413665
The folder ID in the URL is 84151413665. Copy this and place it in the BOX_DEST_FLDR_ID variable of the README.gs file in your Google Apps Script project:
Filtering And Labeling Emails
Next we need to filter and label emails with the attachments you’d like to save in Box. Note that you’ll need two labels. The script will search for emails labeled with PRE_LABEL. Once it’s finished processing an email, it will remove that label and apply the POST_LABEL to indicate it’s finished. This is to prevent the script from doing repetitive work.
To identify the emails, you’ll want to create a filter and automatically apply a label to that filter. Fortunately, Shift has produced the following excellent example of doing just that. Visit their page by clicking on the image for more great examples.

Next, you’ll need to create a label to apply to the processed emails. Thankfully, Bleakton has an example of that as well. Click the image to visit their page for this and many more great examples.

Fill in the remaining variables on the README.gs. PRE_LABEL is the filter you created. POST_LABEL is the label applied after the attachments have been stored. FILE_TYPES are the file extensions you want to save (For example, PDF, JPG, etc). EMAIL is the email address where you’ll receive the Box authorization emails.
Putting It All Together
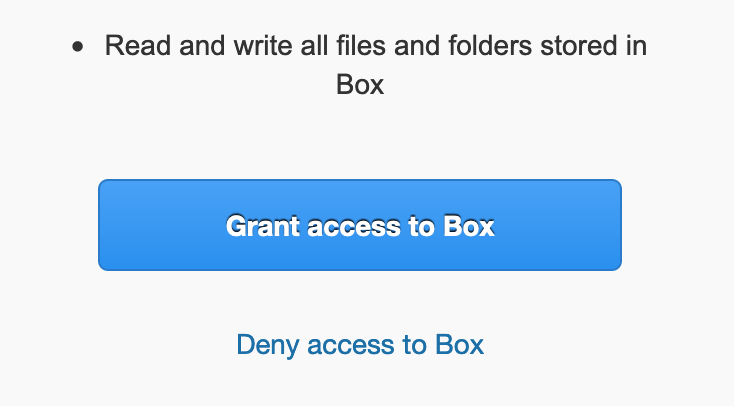
The last steps are to authorize the apps script project to interact with your Box app and configure it to run automatically. Open the Handle_Email.gs file in the apps script project editor and run the forwardMail() function. You will be prompted to give your apps script permission. Follow the steps below to authorize it:

Next, you will receive an email with a link to authorize your apps script project with Box. Click the link to authorize.
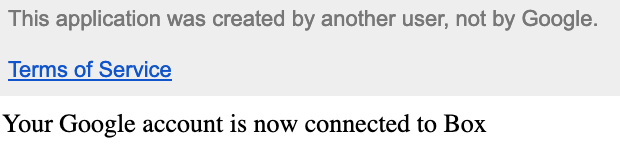
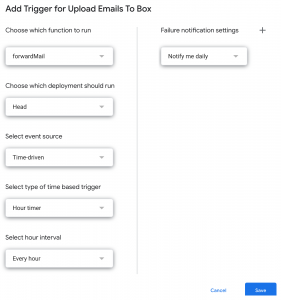
Now your apps script project is authorized to interact with your Box account. Run the forwardMail() script again and attachments from your emails will start to be stored in Box. To automate this process, click Edit > Current Project’s Triggers. A new page will open. In the lower right hand corner, choose Add Trigger. Configure the frequency you’d like and choose Save.
You’re done!
Now the script will run on the trigger you’ve configured. It will automatically move attachments from relevant emails to the folder you’ve chosen in Box.
If you have any issues or questions, don’t hesitate to ask here or reach out via email: jc@jcconnell.com.